Google Forms and Classroom are great for collecting votes, but they don't calculate ranked choice results.
Collect votes using Google Forms or Classroom, then upload your Google Sheets response data to get instant tabulated results with charts and round-by-round breakdowns.
Create your form → Collect votes → Upload to RCV123 → Get instant RCV results
Have votes in a different spreadsheet format? Use the spreadsheet upload page
Quick Steps:
- Create a Google Form using a "multiple choice grid" question (see instructions below).
- Share the form link with your voters.
- When voting is complete, click "View in Sheets" from the Responses tab in Google Forms.
- Download as .xlsx and upload the file below (or paste the link directly if you've made the spreadsheet public).
- RCV123 will automatically detect and import your votes. Results appear instantly and the ballot will be saved in your Dashboard.
- Use Customize results on the results page to change the number of winners, or Edit ballot (in the Dashboard under Ballot actions) to change ballot name, contest names, and other settings.
Direct import supported! Just upload your Google Sheets response data as-is. No reformatting required. New!
Multi-contest support: If your form has multiple ranking questions, RCV123 creates a separate contest for each one. New!
Sign in to upload voting data
Before uploading a file, please sign in using a free account.
Google Forms / Google Classroom Instructions
Part 1: Create Your Google Form
- Create a Google Form.
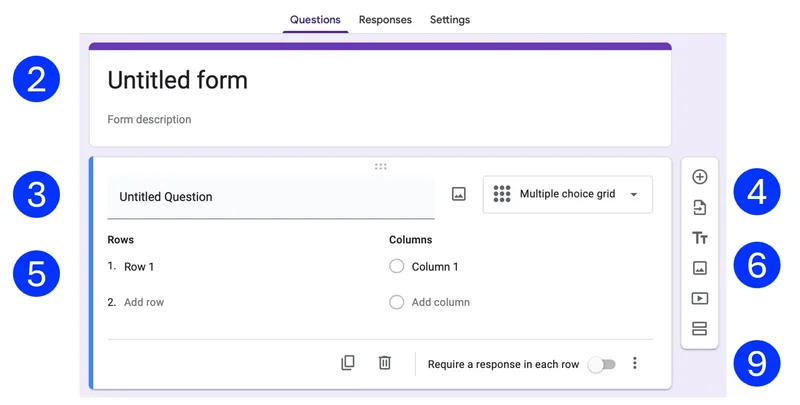
- Where it says "Untitled Form," type in your election's name. The lower part of the form will disappear while you type. Click on the body of the form to make the hidden sections re-appear.
- Delete the phrase "Untitled Question" and leave that field blank.
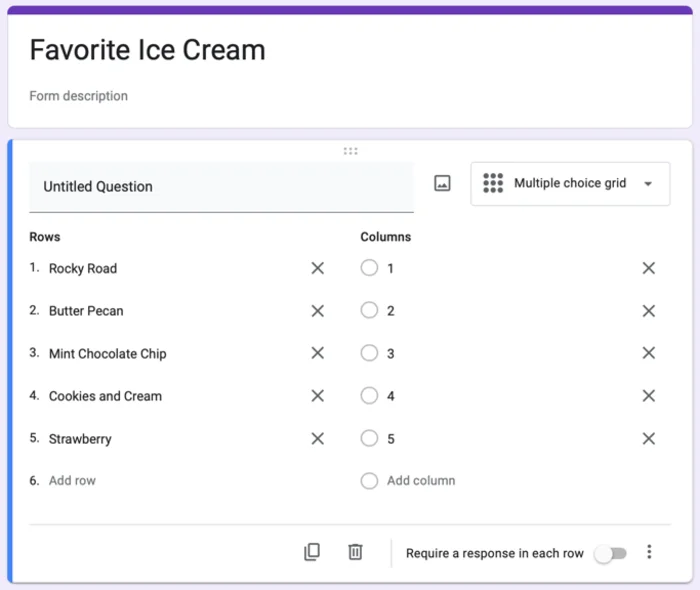
- The default Form type is "Multiple choice." Change that to "Multiple choice grid."
- Put a candidate's name in each row. RCV123 can handle up to 30 candidates and 20 ranks.
- For ranks, label columns with numbers: 1, 2, 3 or 1st, 2nd, 3rd, etc.
Avoid words like "First" or "Second". - You can choose to have fewer ranks/columns than candidates. That reduces the number of ranks your voters will have. If you have a large number of candidates, it may be simpler for voters to have fewer ranks.
- Also, if you have more than 9 columns/ranks, voters will need to scroll the form to see columns 10 or higher.
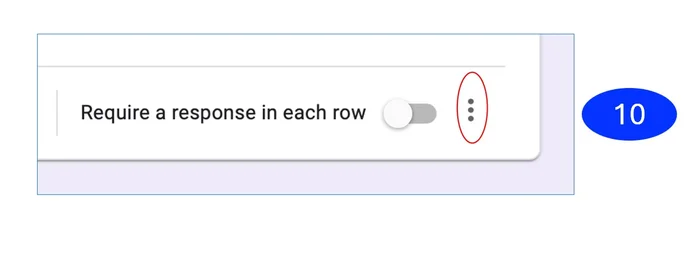
- We recommend that you do not enable "Require a response in each row."
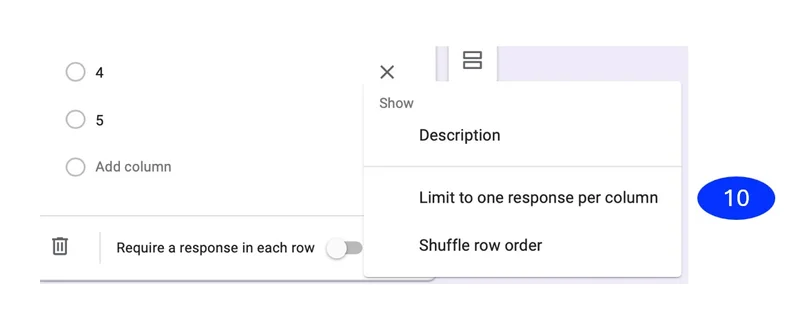
- In the bottom right of the ballot set up area, you'll see three dots arranged vertically. Click on the dots and select "Limit to one response per column." This prevents a voter from giving the same candidate two different ranks.
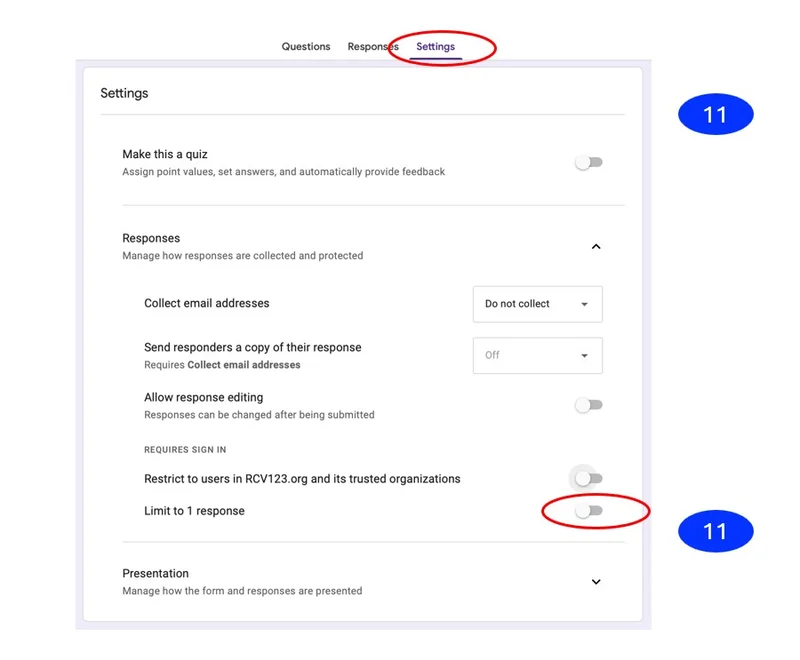
- Now go to "Settings" at the top of the page. Under "Responses," turn on "Limit to one response / require sign in." This limit is not necessary if you are only holding a demonstration or test vote.
Multiple contests? Add additional "multiple choice grid" questions to your form—one for each contest. RCV123 will automatically detect each question and create a separate contest with independent results.
Part 2: Collect Votes and Upload to RCV123
- Share your form with voters using the Send button in Google Forms.
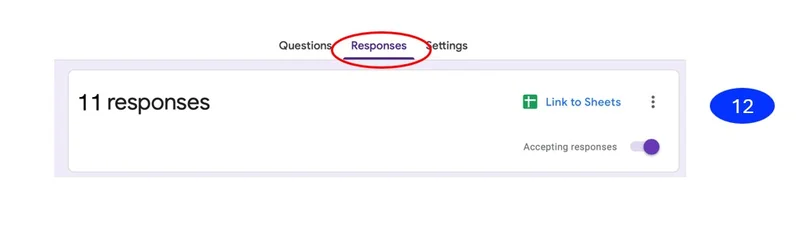
- When voting is over, click on "Responses" at the top of the page. Turn off "Accepting responses."
- Click the Google Sheets icon ("View in Sheets") to open your response data in a spreadsheet.
- Download the file: File → Download → Microsoft Excel (.xlsx)
- Drag the downloaded file into the upload box above, or click to browse.
- RCV123 will automatically detect your Google Forms data and calculate results. No reformatting needed!
- Alternatively, you can paste the Google Sheets URL directly if you've made the spreadsheet publicly accessible.
Example of Completed Multiple-Choice Grid Form